


Products
Solutions
Resources
9977 N 90th Street, Suite 250 Scottsdale, AZ 85258 | 1-800-637-7496
© 2024 InEight, Inc. All Rights Reserved | Privacy Statement | Terms of Service | Cookie Policy | Do not sell/share my information

With the correct permissions, you can create new form and task templates in the Templates manager.
From the Templates manager page, to create a new template, click the Create new form or Create new task button.

This launches a two-step process:
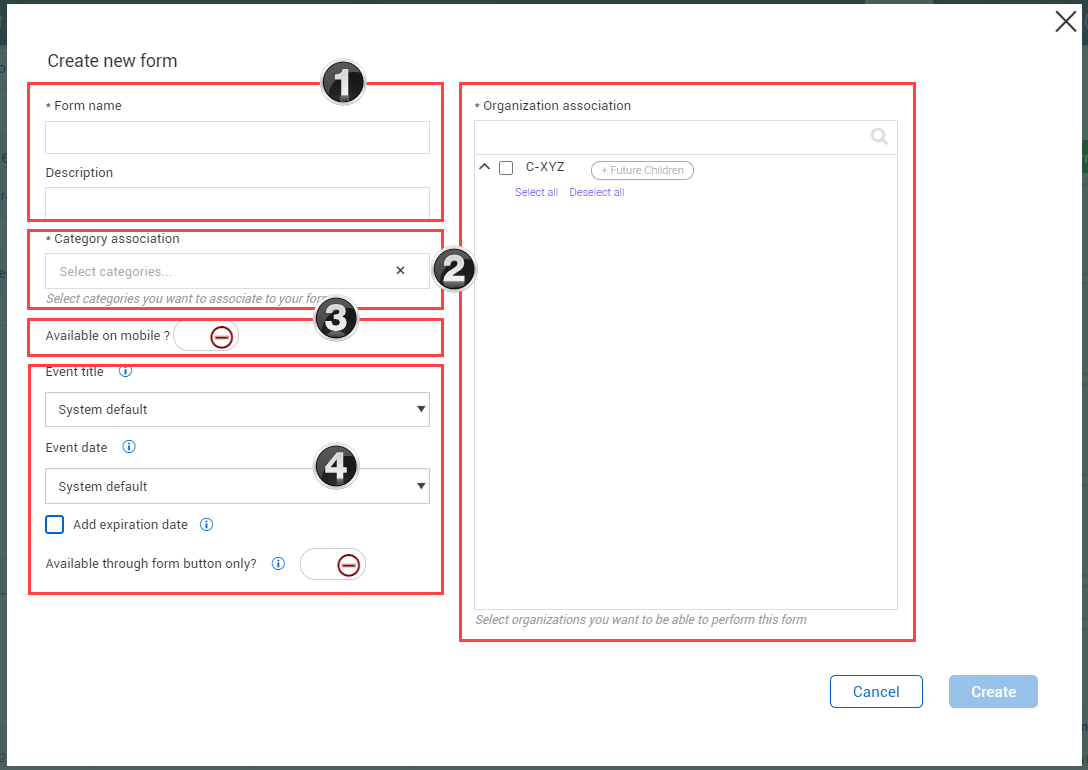
On the Create a form or Create a task dialog box, fill out basic information and settings for the form or task.
You only have the options to create templates for organizations, projects and categories for which you already have assignments.
Each new form or task requires these initial entries:
| Title |
Description |
|
|---|---|---|
|
1 |
Form or task name and Description |
The name or title you give to the template. An optional description can also be added. |
|
2 |
Category and Organization associations |
Associating the form or task with categories and organizations makes it easy to find the form or task using the category and organization filters on the Templates manager page. Categories also determine who can use the forms or tasks. If you do not have assignments to that category, you will not be able to view the form or task to fill it out. |
|
3 |
Availability on mobile devices |
A switch you can turn on to make it available on iOS mobile devices. |
|
4 |
Event title and date settings |
These settings indicate whether the date and title will be filled out automatically with the system default or if they will be filled out with a custom title and date by the person filling out the form or task. An expiration date can also be added if the check box is selected. |
After being filled out, clicking Create creates a new template form or task and the system automatically progresses to the appropriate Form builder or Task builder page. You can continue building your form or task or come back later.
The following steps walk you through creating a new template form.
From the Project home landing page, select Compliance from the left navigation menu.

Select the Safety module.

Select Templates manager from the side menu.

From the Templates Manager page, select Create new form.

On the Create a form dialog box, type Project Manager Safety Walk in the Form name field.
For Category association, select an appropriate item from the drop-down list.
Under Available on mobile, switch to the green check mark to indicate it will be available on a mobile device.
Change Event title and Event date to User defined.
Selecting User defined allows the user to add a future or past date. If you want to control this, consider the option to use.
For Organization association, select the check box for the highest organization level to make the template available for the entire association.
Click Create. The Form builder opens with a section already created and Event title and Event date already populated on the form.

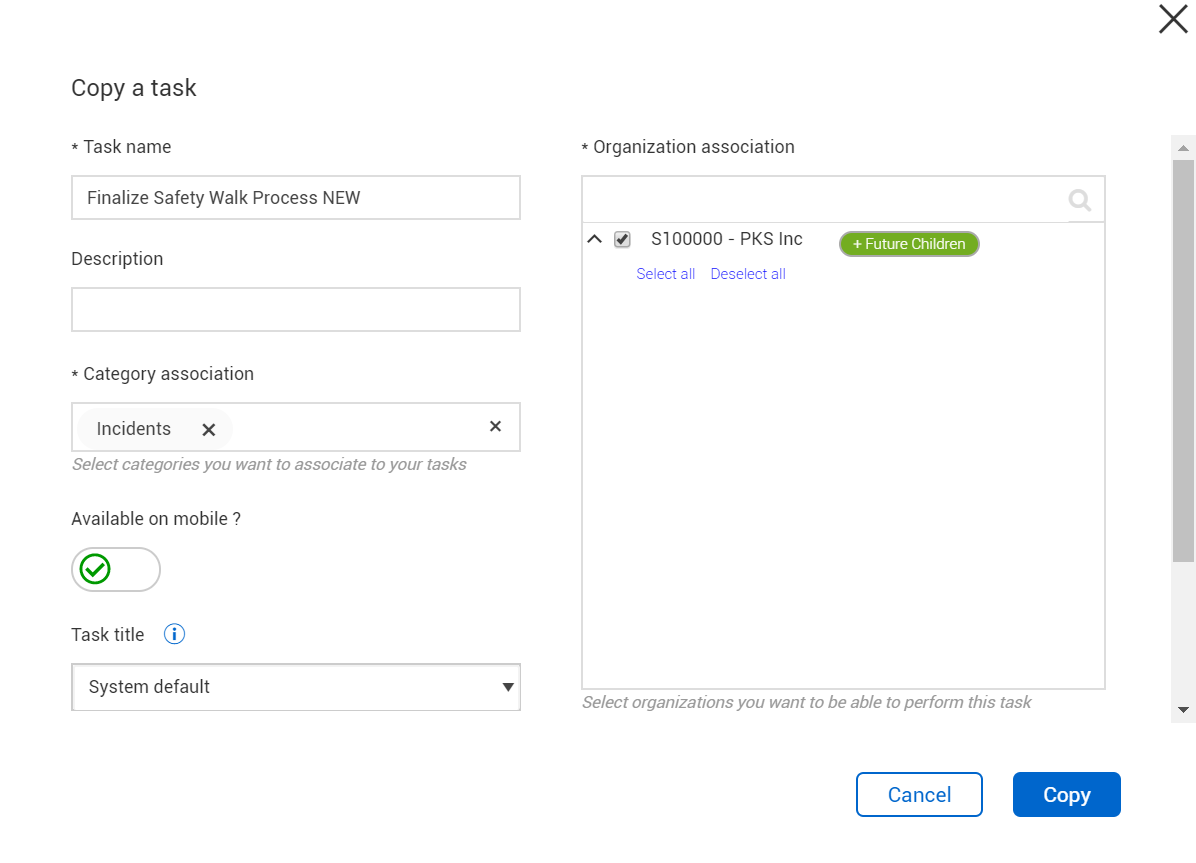
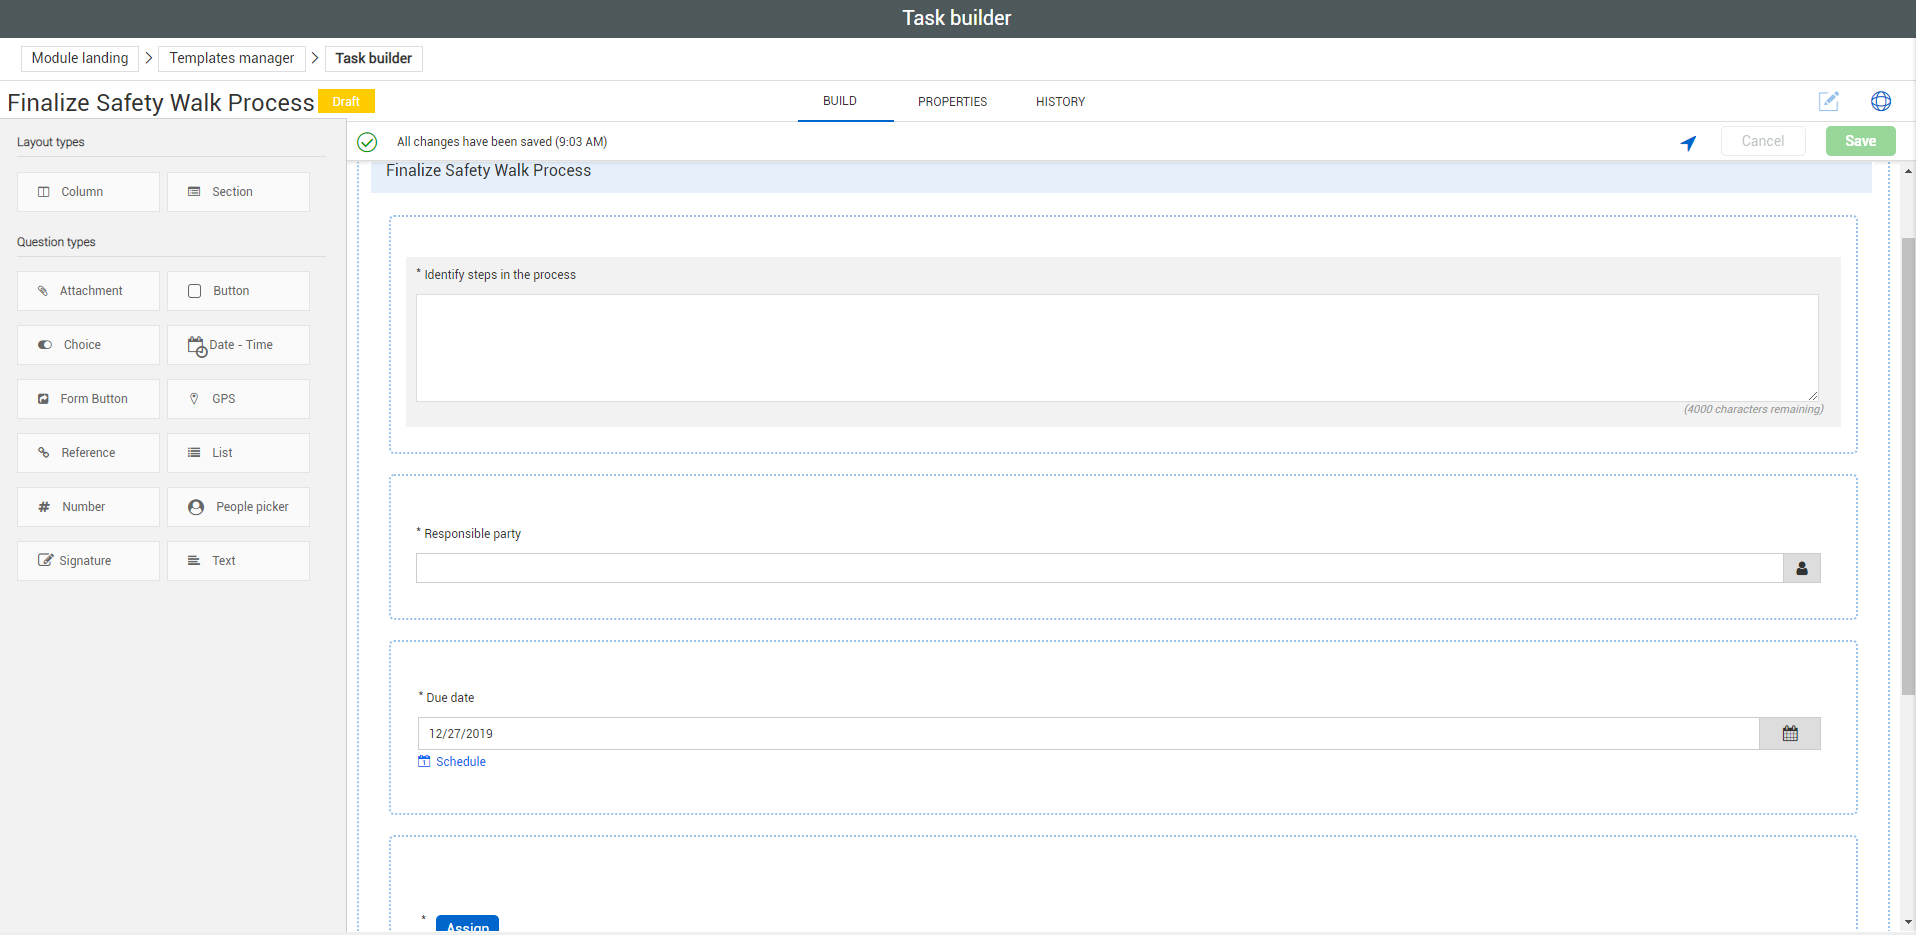
Select the Tasks item type in the upper-left.
![]()
Set Task title to System Default.
Click Create.
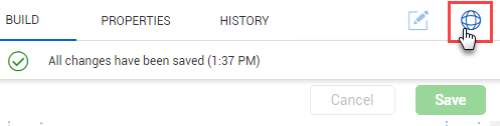
Click the Publish icon.
![]()
Both tasks and forms can be deactivated, reactivated, and copied after being published. The following step-by-steps use a specific task to walk through the processes.
Click the Deactivate icon.

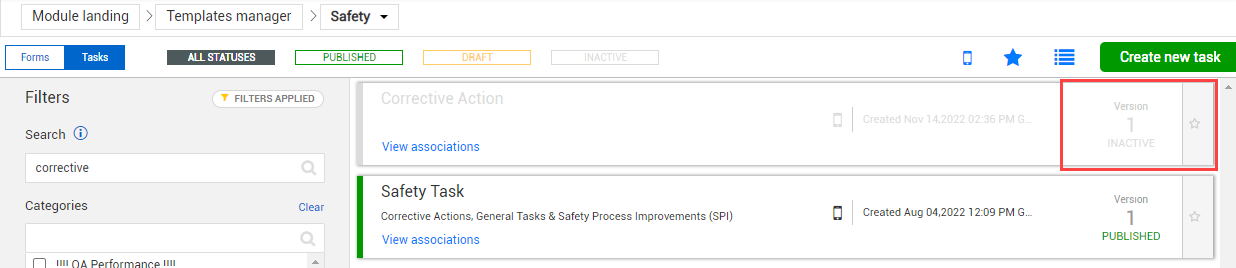
Click the Activate icon.


After being published, the Templates manager opens with the copied task shown.
The process is the same for copying, activating, and deactivating a form.
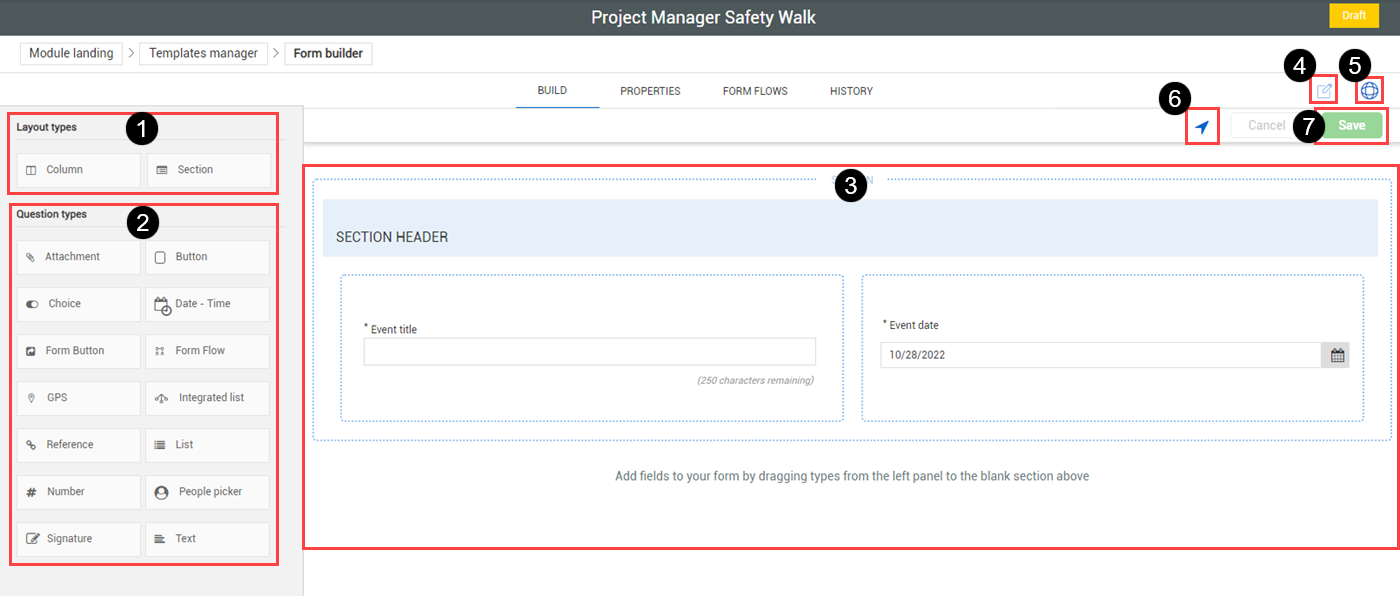
The form builder and task builder consist of the following tabs:
This section focuses on the Build tab.
| Title | Description | |
|---|---|---|
|
1 |
Layout types |
Drag and drop columns and sections onto your form or task. |
|
2 |
Question types |
Drag and drop attachments, buttons, dates, times, form buttons, form flows, GPS, integrated lists, references, lists, numbers, people, signatures, and text fields to your form or task. |
|
3 |
Building area |
The blank area you drag your sections and questions onto. It represents the template you are creating. |
|
4 |
Edit |
For existing templates, allows you to edit the existing template. |
|
5 |
Publish |
When finished building the template, click this button to make the template available for use. |
| 6 | Section | Lists each section on the form or task. |
|
7 |
Save |
Saves the form or task in its current state. If not yet published, it is saved as a draft. |
If you click Cancel, all changes are deleted since your last save. The system does not automatically save.
Layout types let you divide your form or task into sections. Perhaps your form or task covers different topics or areas and you want to organize the form or task accordingly.
When you first drag a section onto the form or task, it creates a section that extends the width of the form or task.

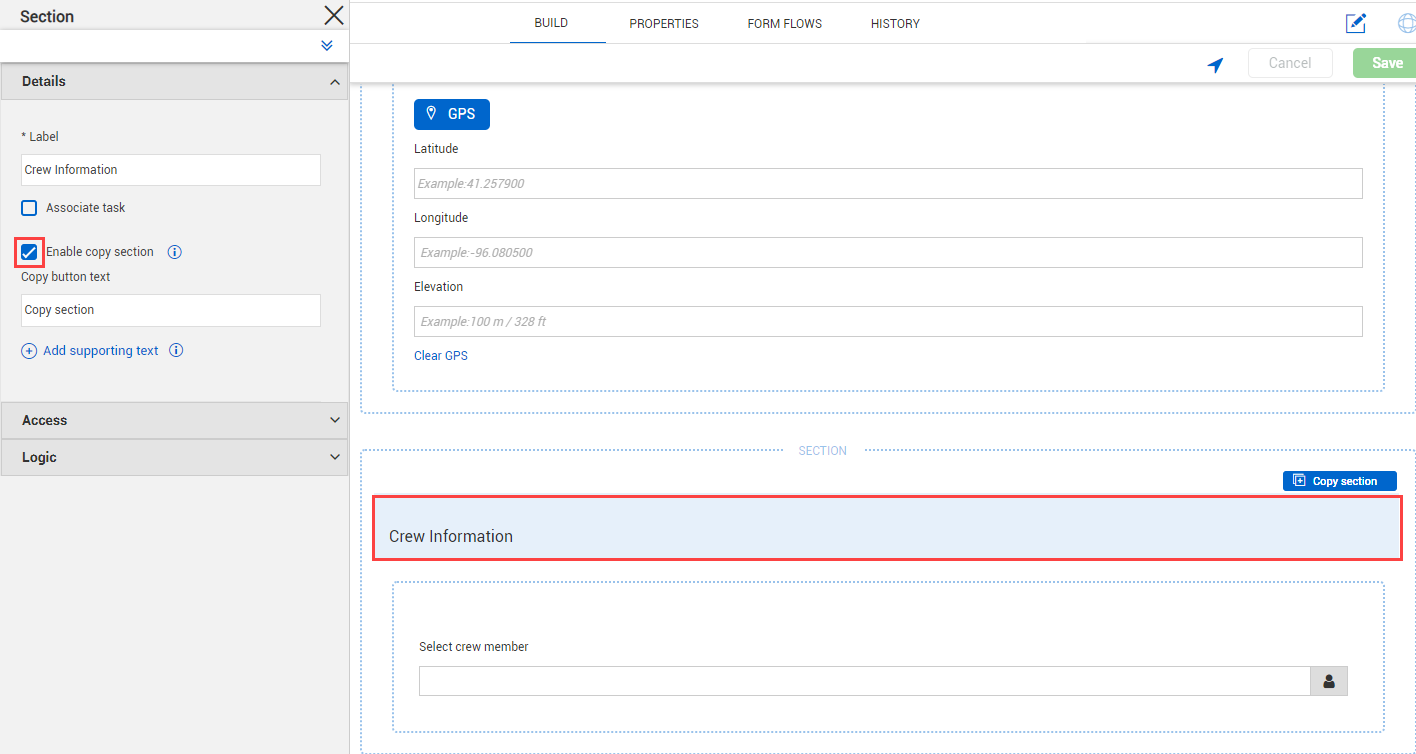
You can let users copy sections when filling out a form or task. This feature lets users determine if duplicate sections are needed, instead of creating templates with duplicate sections in advance.
To let users copy a section, click the section header, and then select the Enable copy section check box in the side panel.
You can change the text of the button. By default, it is named Copy section.
You can enable the copy section option only for sections without mandatory questions, form buttons, or associated tasks.
In the sections you create, you have different types of questions you can drag onto your form or task.
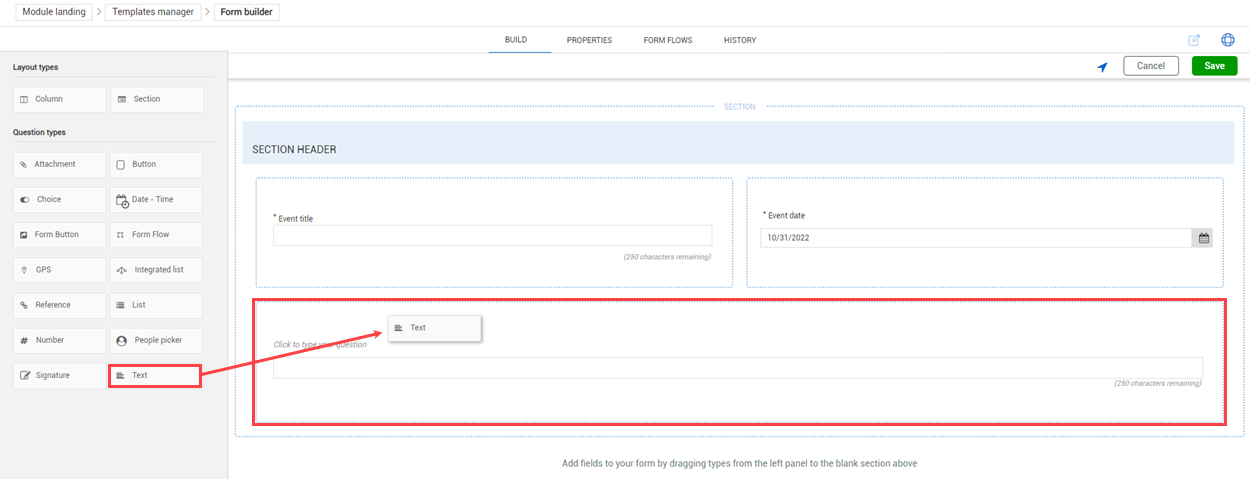
The following is a brief overview of each question type and its key characteristics.
| Question Type | Image | Description |
|---|---|---|
|
Attachment |
|
Enables an attachment (for example, photos, documents) to be added to the form or task. You can include additional text with this question if needed (for example, for instructions.) Attachments can be marked as Mandatory. If integration with InEight Document is set up, attachments can be supporting documents from the Document application. |
|
Button |
|
Adds a button to the form or task. You can set the button to close and/or change the status of the form or task. The button type can also be marked as single-use or multi-use. Buttons can be marked as Mandatory. |
|
Choice |
|
Adds a question with two options. Settings include icons and predefined text answers (e.g., yes/no, pass/fail, and accept/reject) or you can customize your own. Choices can be marked as mandatory. You can mark answers as exceptions. |
|
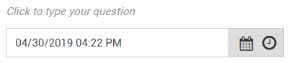
Date – Time |
|
Adds a field to fill out either date and time, just the date, or just the time. Dates can be marked as Mandatory. |
|
Form Button |
|
Adds a button that opens another template from within your form or task. It can be designated as single-use or multi-use. Form buttons can be marked as Mandatory. You can set this button to change the form or task's status when it is clicked. Status change does not affect the form or task that is opened by the button. |
| Form Flow Button |

|
Adds a button that facilitates a specific step in a form flow. Form flow buttons can also go back to a previous step. |
| GPS |
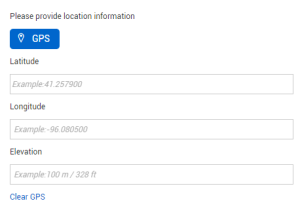
|
Lets users enter their location coordinates. Coordinates can be entered manually or by clicking the button. |
| Integrated list | 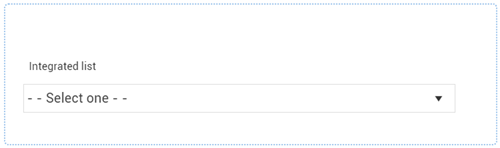
|
Adds the integrated list question type to your form that integrates with InEight Platform Master data list resources. |
|
Reference |
|
Adds a supporting document attachment, event or task, or a hyperlink to other pertinent information. References cannot be marked as Mandatory. |
|
List |
|
Adds a multiple-choice question to the form or task. Answer options include radio buttons, check boxes, drop-down lists, or multi-level drop-down lists. You can select answers from predefined lists or create your own. Lists can be marked as Mandatory. You can set default values for radio buttons, check boxes, and drop-down lists. Default values are selected when a user opens a form or task and requires the user to manually select a different value. You can mark answers as exceptions. For more information about multilevel drop-down lists, see Multilevel Drop-Down Lists. |
|
Number |
|
Adds a question that requires a numerical answer to the form or task. The number can be formatted to be currency, decimal, $, %, or phone number. Numbers can be marked as Mandatory. |
|
People Picker |
|
Adds a question that must be answered by selecting users from the drop-down list. People pickers can be marked as Mandatory. You can let end users select multiple users or none. You can also select whether end users can choose from only assigned users, who have a Compliance role, or all project-level operational resource, which includes users who do not have Compliance roles. You can also show users' employee IDs with their names and set up an email to send when a user is selected. Operational resources are managed in project home page > Assigned operational resources. |
|
Signature |
|
Adds a signature block to the form or task. Signatures can be marked as Mandatory. |
|
Text |
|
Adds a question that requires text for the answer. The field can be short or long text, or you can use this question type to only be a label with no text field. Text can be marked as Mandatory. |
After a question is added, you can click the question in the section.

A slide-out panel is shown on the left. You can type your question and define the settings related to the question. As you type the question, the question populates into your template.

You can also click on the text within the question type on the form or task and it will enter the text on the slide-out panel.
All question settings include the option to make the question mandatory. This means the person filling out the form or task is not able to submit the form or task until the question is answered.
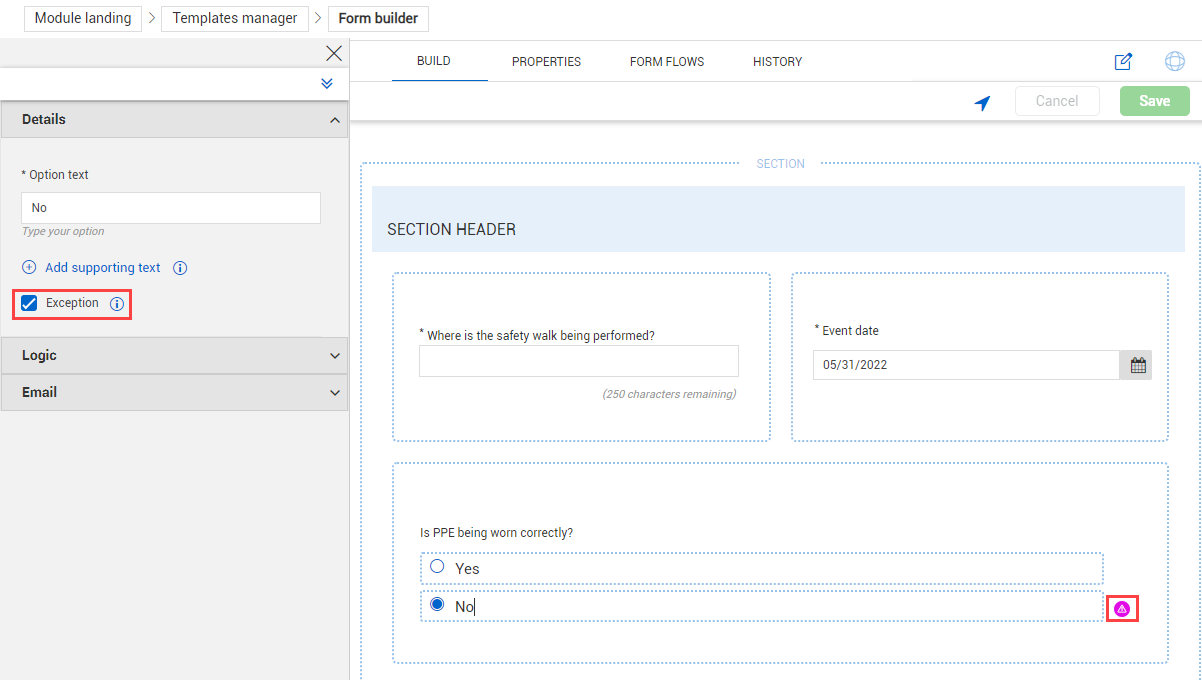
You can mark responses to list and choice questions as exceptions. This feature is useful to indicate responses that are undesired or outside of normal business processes in some way and have those exceptions show in reporting. To set a response as an exception in the form or task builder, select a response to a list or choice question. In the Details side panel, select the Exception check box. An Exception icon is added to the right of the response. This icon is visible only in the builder.
Settings for each question and section also include an Access section with a Manage access button. In the Manage access dialog box, you can control which users or roles can view or answer each individual question or entire sections when filling out the form or task. If they do not have access, they do not see the question on the form or task.
View and edit permissions are set separately from each other. You can manage access for all sections and questions in a template in the dialog box. It does not matter which section you choose when you click the Manage access button.
To control who can see data in reports on question responses, add reporting tags in the Access section. Users with the same reporting tags that you set here are able to see this data when using reports.
The Logic setting lets you show or hide a question based on the response from another question on the form or task. For example, you are creating template for a safety tour, and have added the Choice question “Did you recognize any safety wins?”

Following this question, you add a Text question for them to indicate the wins they had, but you only want this question to show up if they answered yes to the previous question (did you recognize any safety wins?).
Under the Logic section of the Text question’s properties, you select Leading questions.
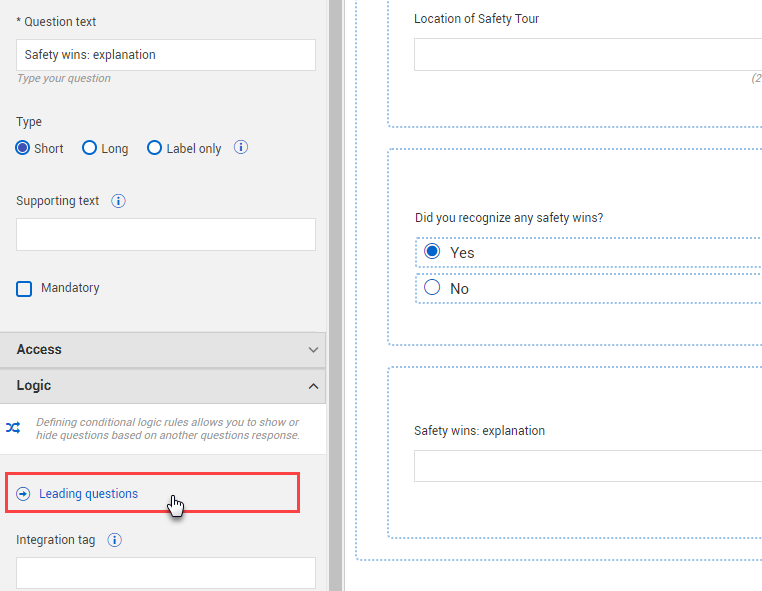
A Leading questions dialog box opens, where you set the Text question to show when the user answers Yes to the “Did you recognize any safety wins?” question.

Depending on the form or task, you can show or hide the question depending on how the other question is answered.
If there is a form flow button that can be reversed, you can apply separate leading logic sets to the reverse form flow button and the form flow button that advances to the next step.
You can use classifications to apply logic in your forms in List and Choice questions. For more information, see Classifications.
When hovering over a question on your template, three options are shown:
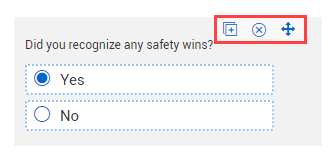
You can move questions by clicking and holding anywhere on the question and dragging it into place.
The following Step by Steps walk you through building out a template using the Task builder and Form builder.
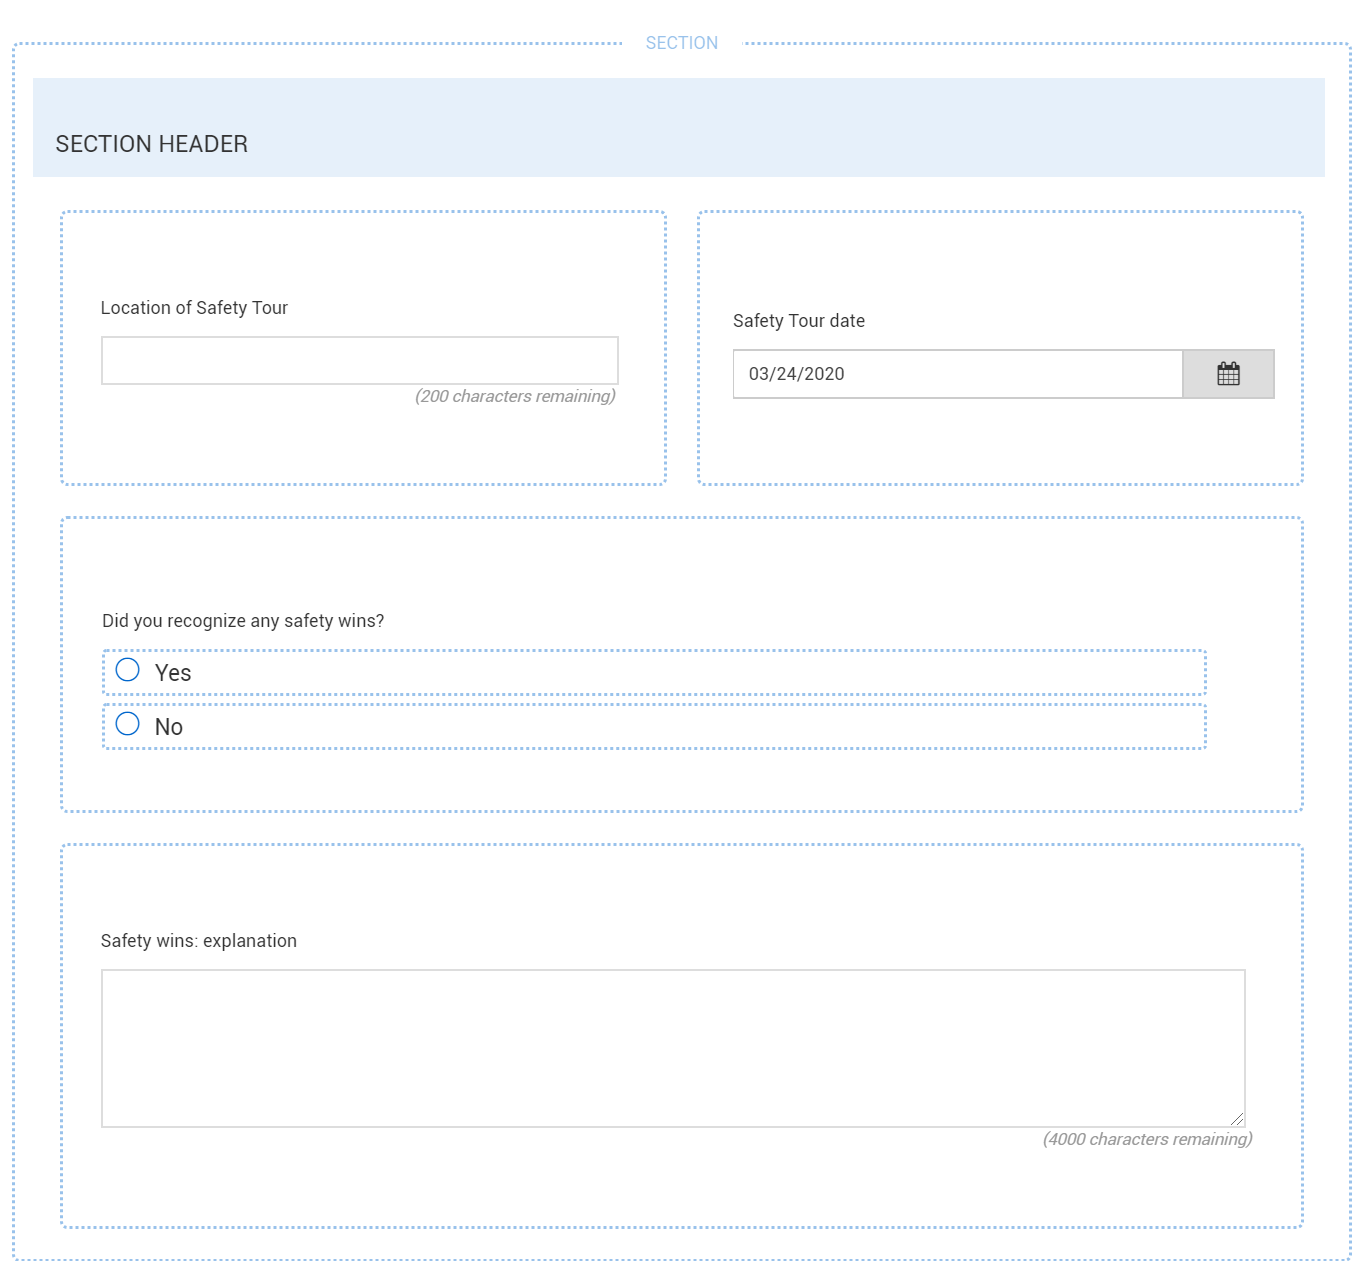
From the Form builder page of the Project Manager Safety Walk template you created in the previous Step by Step, confirm your form mirrors this design:
As needed, close a settings slide-out panel.
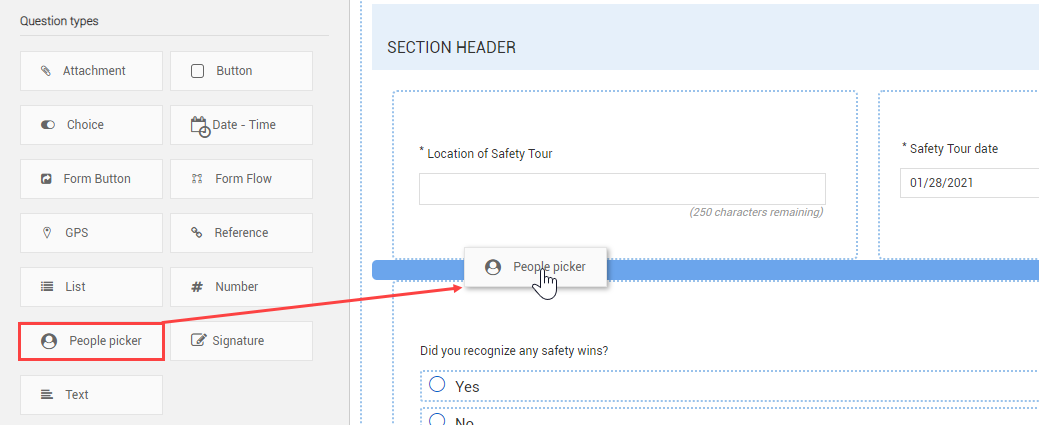
Drag and drop the People Picker question type into the existing section underneath the Location and Date questions.
Click on the question and type Who is leading the tour? in the Question text field.
Close the People Picker settings slide-out panel.
Drag and drop the Date - Time question type to the right edge of the "Who is leading the tour" question, so it becomes a second column on the same row.

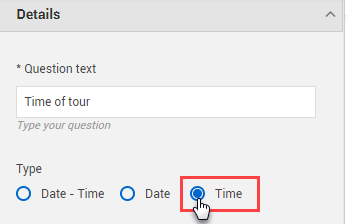
Click on the Date - Time question and type Time of tour in the Question text field.
Under Type, select Time so the answer selection will only be for a time, not a date.
Close the Date - Time settings slide-out panel.
Drag and drop the Text question below these two questions.
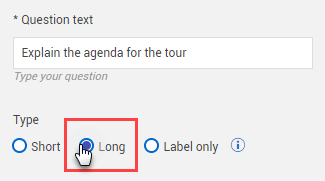
Click on the question and type Explain the agenda for the tour in the Question text field.
Under Type, select Long so the user has more room (4000 characters) to enter a response when filling out the form.
Close the Text settings slide-out panel.
Drag and drop the Choice question type into the existing section underneath the agenda question.
Click on the question and type Did you find any unsafe items? in the Question text field.
Under Predefined lists, select Yes/No from the drop-down list.
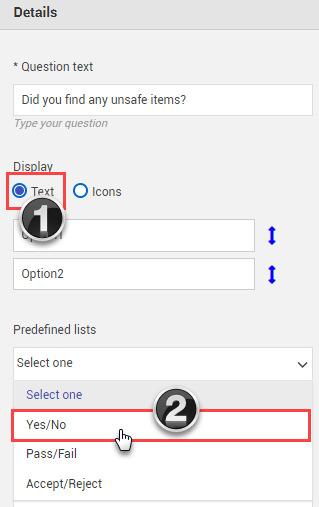
Select the Mandatory check box.

Close the Choice settings slide-out panel.
Drag and drop the Text question type into the existing section underneath the safety win question.
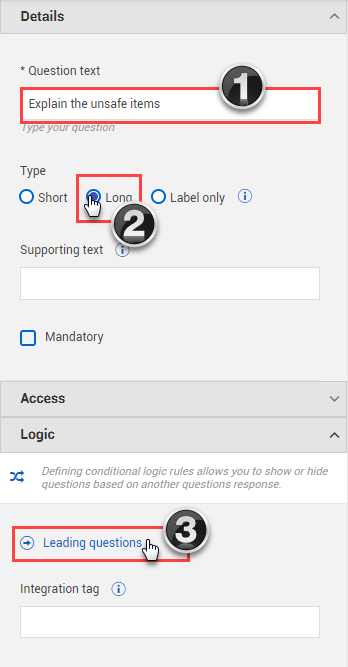
Click on the question and type Explain the unsafe items in the Question text field.
Under Type, select Long. You want to only show this question if the user answered Yes to the previous question (Did you find any unsafe items?).
Expand the Logic section and select Leading questions.

Switch the Show/Hide toggle to Show.
From the Select a question drop-down list, select Did you find any unsafe items?.
From the Select a response drop-down list, select Yes.
Click Save to close the Logic rules dialog box.
Close the Text settings slide-out panel.
Drag and drop the Attachment question type into the existing section underneath the existing questions.
Click on the question and type Provide photos from the tour in the Question text field.
Close the Attachment settings slide-out panel.
Drag and drop the Button question type into the existing section underneath the existing questions.
Click on the question and type Submit the completed tour in the Button text field.
Select the close the form upon the button selection box.

Under Change status to, select Complete from the drop-down list.
Expand the Email section, and select Add email.
From the dialog box, add a Subject line such as "Tour has been completed"; select role and/or user; and add content to the body of the email such as "Please review at your convenience." Select the @Reporter if desired.
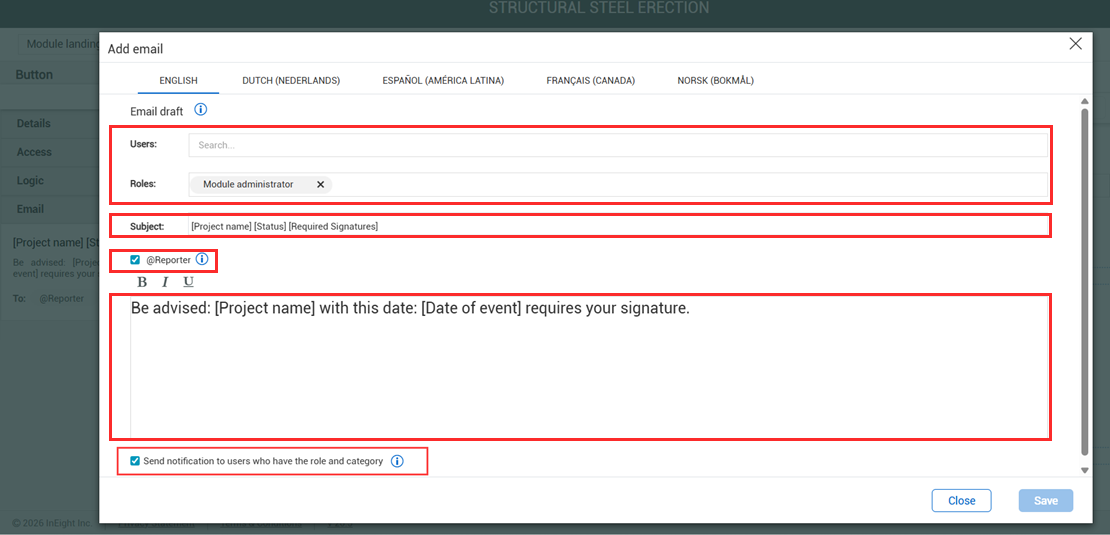
You can limit notifications to users who have both the selected role and the forms category by selecting the Send notifications to users who have the role and categoryoption.
Click Save.
In the upper-right corner, click Save to save your new template form.

Using the List question type, you can build branching questions using a multilevel drop-down list. For more information, see Multilevel Drop-Down Lists.
When you create a task or an event from another task or event, you see the referenced item in both associated tasks or events, letting you see which events and tasks are associated. For more information, see Referenced Forms and Tasks.
Additional Information
9977 N 90th Street, Suite 250 Scottsdale, AZ 85258 | 1-800-637-7496
© 2024 InEight, Inc. All Rights Reserved | Privacy Statement | Terms of Service | Cookie Policy | Do not sell/share my information